Birth of a Phaeton
Tiffin Motorhomes is unique in the RV industry in its 'open' attitude
towards customers and potential customers.
In practice, this means that when you take a factory tour, you are allowed
to take pictures of anything. When your coach is being built, you are allowed
to walk into the factory and follow it along the assembly line and take pictures.
No other RV manufacturer allows you this much freedom, not even on a guided
factory tour.
(click on thumbnails to see larger images or video - Windows WMV format)
Orientation
Here's an aerial view of the Tiffin plant (from Google Maps):
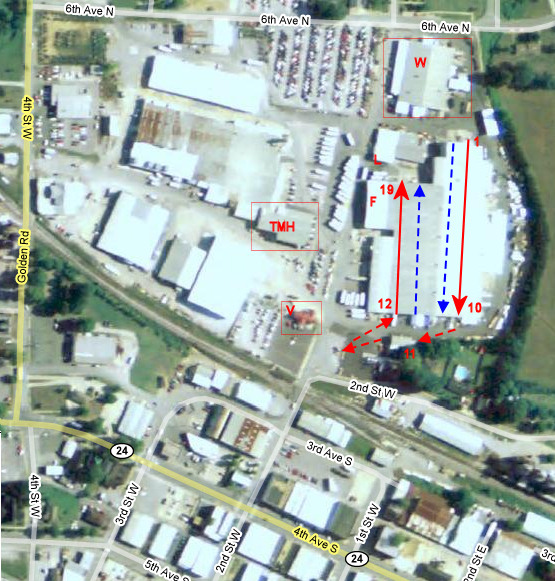
I've marked the following items on it:
Factory tour
If you want a guided tour of the factory, just show up at the Tiffin
Visitor Centre (see aerial view above for location), 15 minutes before the
tour time (10:00 and 14:00, Monday-Friday). Most (all?) of the tours are
given by Red Davis who is in his 80's. He's one of TMH's treasures.
Watch your coach being built!
Here is an introduction from the (undated) tan-coloured "Welcome" pamphlet available in the Tiffin Visitor Centre:
Dear Customer:
If you are here to watch your motorhome being constructed, this applies to you. If not, please disregard.
We are delighted you have decided to purchase one of our quality built motor homes.
Our Company has built a solid reputation for customer satisfaction that we are very proud of.
Lately we have had an increase in the number of customers who are staying and watching the construction of their motor home.
There is no problem in watching, but you must keep in mind we are running a production line. It is therefore essential that a few guidelines are established and strictly adhered to!
- Safety glasses must be worn in all production facilities
- Watch the construction, but do nothing that will slow the works ability to complete their jobs in a timely manner
- Once production starts, any requested changes will dramatically increase the price of your unit
- Watch your step and use extreme caution while on the premises.
Tiffin accepts no liability for damage or injury on company property or campground.
If you will help us by adhering to these guidelines, it will be of great benefit to all concerned.
Your cooperation is greatly appreciated.
"Wherever You Go We Go"
Yours truly,
Bob Tiffin, President
Tiffin Visitor Centre |
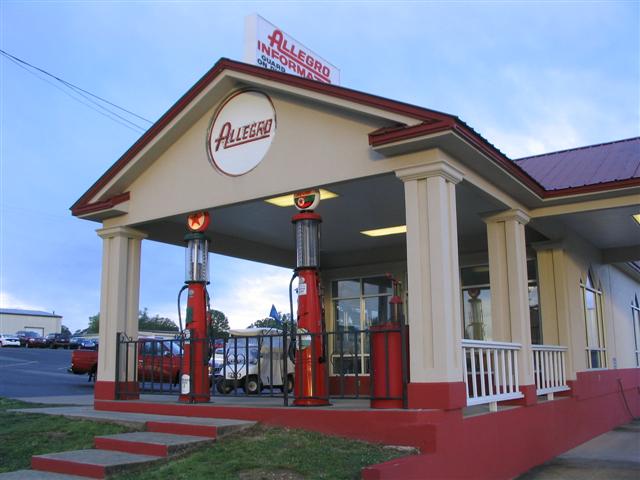
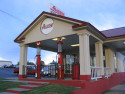
This is a very informal process. All you need to do is show up at
the guard house in the Tiffin Visitor Centre (the one that looks like an old gas station), tell the guard that
you're going in to watch your coach be built, and then sign in.
He'll give you a pair of glasses and a "Visitor" badge (or similar).
Then you are pretty much free to walk around anywhere you like.
If you've taken the tour, you'll know where to go. Otherwise,
refer to the aerial view (above).
The paint plant is in Belmont, MS a short distance away and you are welcome to
visit it as well. Stop at the guard house, sign in and get your safety glasses
and visitor pass and then wander around the buildings. You'll see how the coaches
are masked and painted - it's quite amazing.
Some things to keep in mind:
- Production starts at 06:00 every day, so you need to get up early! Bob Tiffin
starts earlier than that, and you may seem him walking around with his entourage
on an early morning tour.
- Some people think they'll just go for an hour, go away for an hour, then
come back - just dropping in occasionally to see progress. They usually end
up staying from 06:00 until 16:00 with their eyes glued to every little thing
being done. It is fascinating, so plan to spend the whole day there.
- A day in the factory starts at 6:00am and ends at 15:00 There is one break
in the morning from 9:00-9:20 and lunch is from 11:20-12:00. If you don't
want to miss anything, take your breaks at the same time - hurry back or
you'll miss something!
- The plant is shirt-sleeve environment - wear something comfortable,
but nothing loose that might get caught in equipment. Good sturdy shoes
are recommended for safety and because you'll be standing on your feet all day!
I've been there in November and April and it's comfortable weather. I bet it's
dang hot in summer. There's no A/C, but all of the end and side doors of the
plant are open.
- You can leave and re-enter the plant at the end of the lines
(station 1/19 or 10/11) or on the west side, near station 16.

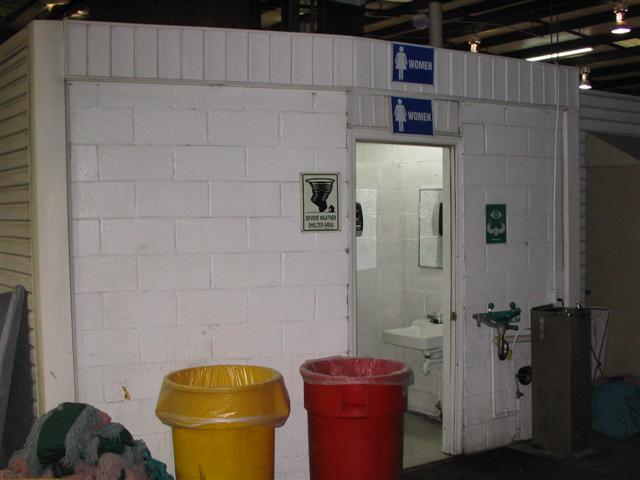
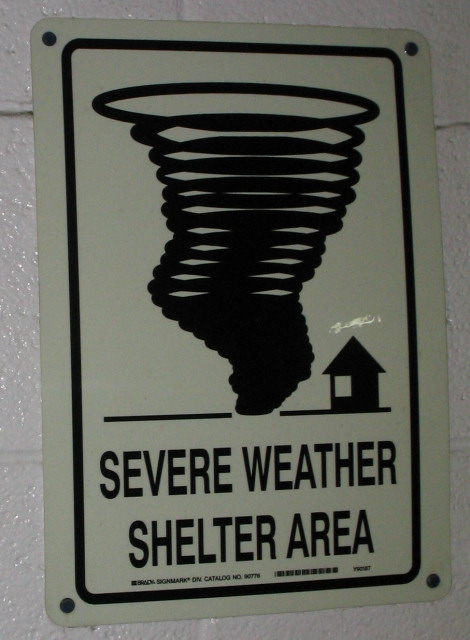
Washrooms in Tiffin plant |
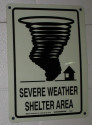
There are washrooms in the visitor centre. Inside the plant, you'll see the
washrooms at the end and middle of the building - they are concrete block
and have a tornado symbol on them.  - The factory is not a particularly dangerous environment, but you need to be constantly alert
and aware of things moving around and above you. The workers don't object to your
presence and are happy to answer questions, but stay out of their way - don't wait to be asked.
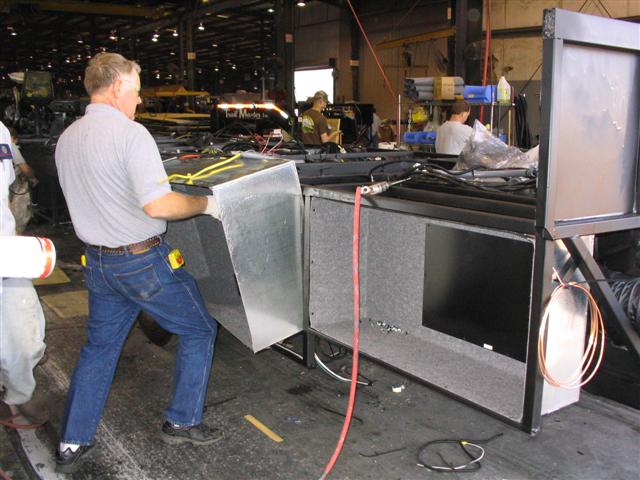
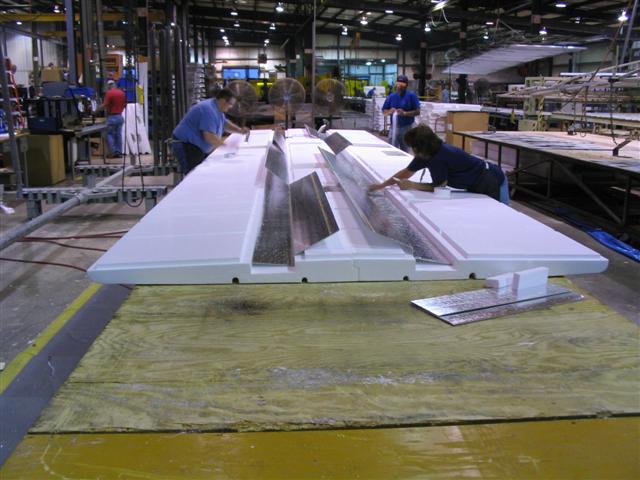
- There is a lot of activity off to the side of the line. That's where all of the
components are being built or assembled - things like slides (ready to drop in, complete
with all of the furniture, sinks, countertops etc.), cabinets, etc.
- Your build number will appear on everything that goes into the coach,
from chassis to chairs. Wherever you are, look at all of the parts, components, walls, floors etc.
to find your stuff, as identified by the number.
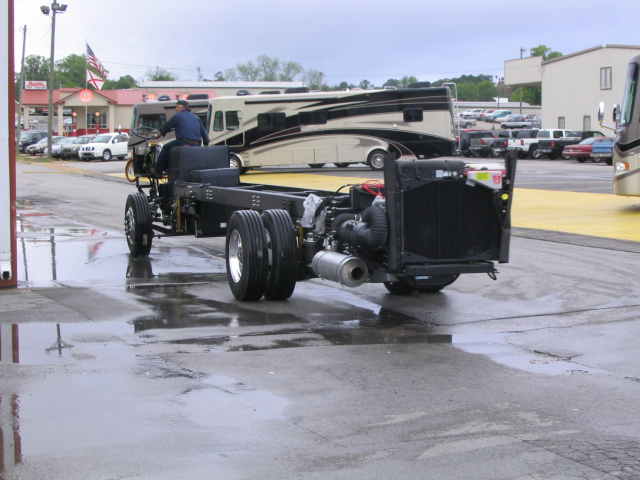
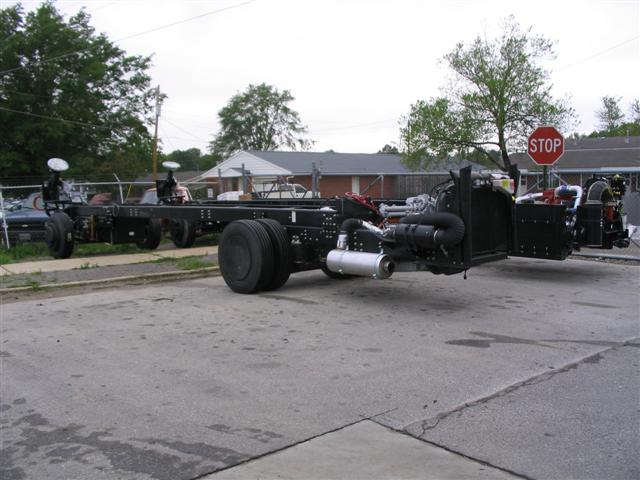
- If you get there before your chassis goes into welding, you'll see it outside way
at the back of the Welding building and you can get pictures of it there - it's the last time
you'll see it so naked. It's a good opportunity to see it before it's covered up.
If you skip the welding stage, at least be at station 1 before
it's scheduled to go in, so you can see it outside (panels welded in, and wiring
harnesses in place) and get some semi-naked pictures. Then just follow it in.
More information
A more detailed description of the work done at each station on the assembly
line can be found in the In your corner section of Roughing it Smoothly:
- Volume 1, Number 4 (Building the Foundation - chassis) - page 23
- Volume 2, Number 1 (From chassis frame to raw interior - station 00 to 7) - page 44
- Volume 2, Number 2 (The architecture of a slideout) - page 34
Overview
Chassis are stored in the "Field of Dreams" (you'll see it on the way to
the Allegro Campground on the east side of 4th Street, and also on 3rd Street - the
next street to the east) and are brought over to the Mechanical shop for preparation. Then they go over to the
the Welding shop (you'll see a few lined up at the NW corner of the building, ready to go in).
Once the chassis leaves the Welding shop, it moves to the entrance to the main
assembly plant at station 1.
There are two assembly lines - one for diesel coaches, and another for gas coaches.
Quite often, you'll see a diesel coach on the gas line too, depending on their
production levels. The coaches go one way through the building (stations 1-10), then
they go outside to station 11 where undercoating is sprayed on and water systems are
filled and checked. Then they go back into the building for stations 12-19, in the
opposite direction. When they leave the building at station 19, they are sprayed
with water to check for leaks.
The coaches then go back to the Mechanical shop for alignment and a road test, after which
they are driven over to the paint plant in Belmont.
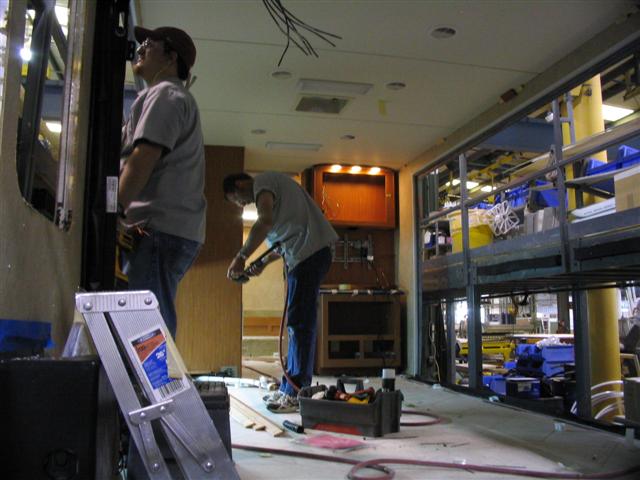
Stations 1-12 are the most interesting, because you'll see the structural
build (tanks, floor, walls, roof, slides, caps, exterior doors etc.). The remaining stations (12-29)
focus more on the bay doors, and inside work. We took a lot of pictures from
station 1-12 (outside), but we stayed out of their way for the remaining stations,
because there were so many people working inside, going in & out all the time.
We stayed outside, and only went inside when they told us they were done or almost done
or if it looked like activity inside had ended.
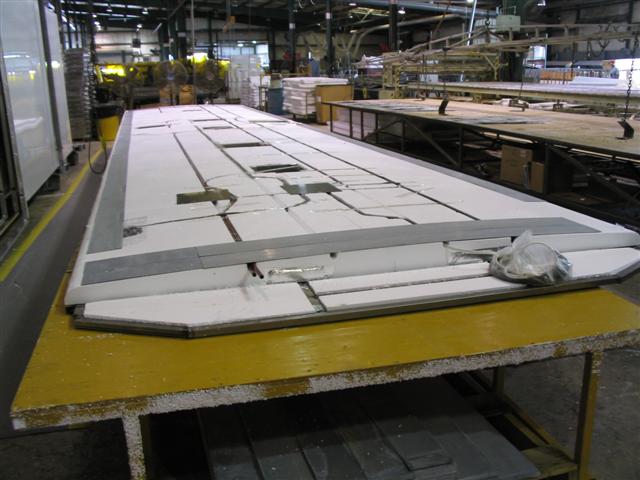
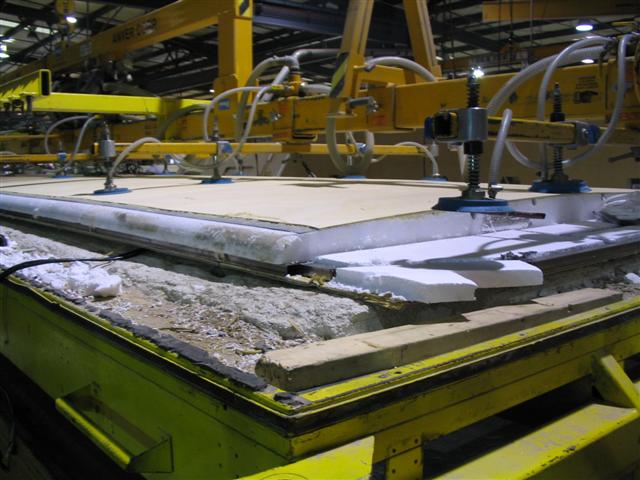
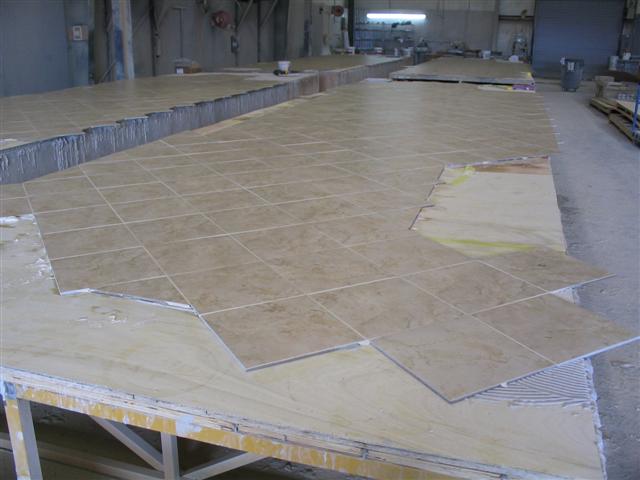
If you go to Belmont, there is one building where the tile floors are made.
The tiles are glued to a single piece of plywood which is then shipped over
to Red Bay and lowered into place on the chassis sub-floor.
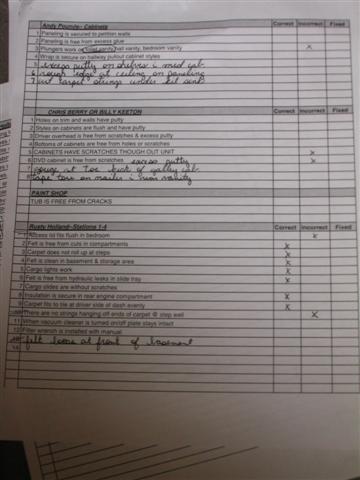
A certain amount of QC (quality control) paperwork follows the coach down the line,
with notes on omissions, defects etc. You'll see that paperwork in the coach around Stations
17-19. A QC person reviews the lists, and calls specific people to come and fix items that are
still outstanding. For example, he may call a carpenter from the slide area to come to station 17 to fix or
replace a defective cabinet door. As you follow your coach down the line, watch for
blue tape on areas where defects have been found. Hopefully, those will all be taken care of by
the time the coach exits the building, but some may remain on the list until later if
immediate resources are not available. For tile defects, the tile guys (from Belmont)
come in later to break out and replace damaged tiles.
Some other highlights (for me, anyway):
- watching the tile floor drop into place
- watching the walls go on
- watching the roof go on (but you can't see much - all the action is up top)
- inserting the slides into the chassis
- station 10 - alignment of front cap/headlights using a laser
We were present for 4 days only - from station 1 to 19 (April 23-26, 2007).
We did not go to the Mechanical building before or after assembly, because
we had heard that there's not much to see and you're not really allowed inside
(you need protective goggles to watch welding).
Our coach was out of Station 19 and was checked for leaks easily by noon on the 4th
day of the assembly line work (6th day since welding started). That afternoon
we drove over to the Belmont paint plant. We saw it ready to go in for sanding,
but we didn't follow it through the paint plant primarily because we didn't know
when it would be completed. The coach may make several trips back & forth
between the Fit & Finish area in the main plant (beside Station 19) and
Belmont before everyone is happy and has signed off on the coach. Instead
we went back home to Ottawa, and waited for our dealer (Sherman RV) to call
us when it arrived. It went into welding on April 19, and arrived at the dealer
May 8 - a total of 20 calendar days, 14 working days.
How long will it take to build my coach?
It will take approximately 2 weeks. Once you know the date your coach goes
into welding, allow 6 days for it to go through the welding shop and the main
factory and emerge at station 19 - that process continues without interruption.
Allow another week for it go over to Belmont for painting and back to Red Bay for
Fit & Finish. However, it might take longer than that - if Fit & Finish
finds problems with the paint or tile, they will send it back to Belmont.
Since this back & forth process is not clearly defined, it's difficult
to know how long it takes and how long it might sit waiting for work at either
end. So it's difficult to know exactly when your coach
finally leaves the plant to go to your dealer. On top of that, scheduling of
transport to your dealer is an unknown factor, as is driving time (obviously
this is less significant if your dealer is Sherman or Bankston).
If you have limited time, the best use of your time is to show up to watch
it go through Station 1-19, then over to Belmont for a few hours to see how
the paint shop works (looking at other coaches - yours may not be there yet).
Tiffin Production Steps
The information in the table below is a composite of the following:
- the timetable (date, time) for my 2007 Phaeton 36QSH (entered welding 2007-04-19, arrived Belmont 2007-04-26). Your dealer should provide this to you. Note that the time shown for each station applies to my coach - yours will be different, depending on where your coach is in the production sequence.
If not, ask for it. If you still can't get it, call Tiffin and ask to speak to Stephanie and she'll send it to you.
- a list of general activities at each station provided by my dealer (probably came from Tiffin). It was dated 2006-11-30.
- additional comments and photos from me. Note: most of the pictures of the chassis before Station 1 and of the coaches at Belmont are not my coach - the captions are marked "(SOC)" - Some Other Coach.
- comments from several people who have better memory or better note-keeping skills than me!
| Day |
Time |
Station |
Activity |
| Mechanical shop |
| |
|
|
The chassis is pulled out of the Field of Dreams and goes into the mechanical
shop (shop supervisor: Herbert). They install a plastic seat, steering wheel,
some air lines and wiring. They check all fluids, grease all fittings and install
covers to protect the aluminum wheels (if you've ordered them).
Then it's driven over to the welding shop and parked outside.
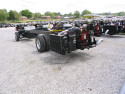
Field of Dreams (SOC) |

Chassis on the move (SOC) |
Chassis ready for welding (SOC) |
|
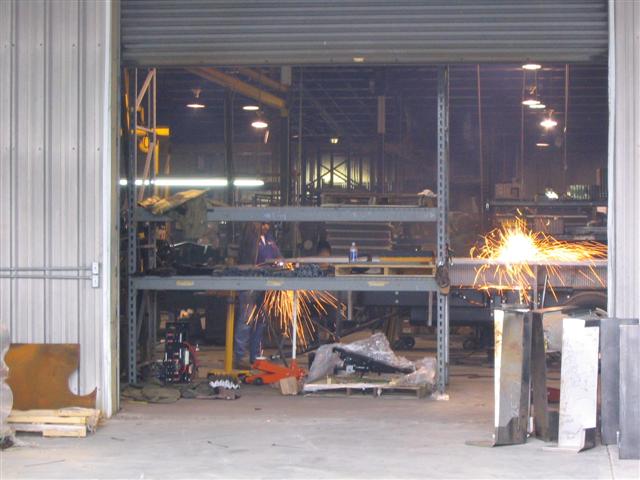
| Welding shop |
| 1 |
08:30 |
1 |
Tiffin welding shop (SOC) |
|
| 09:55 |
2 |
??? (details unknown) |
| 11:10 |
3 |
??? (details unknown) |
| 13:05 |
4 |
??? (details unknown) |
| 2 |
06:00 |
Paint |
??? (details unknown) |
| 08:30 |
Wire |
??? (details unknown) |
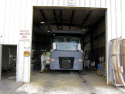
| Main plant |
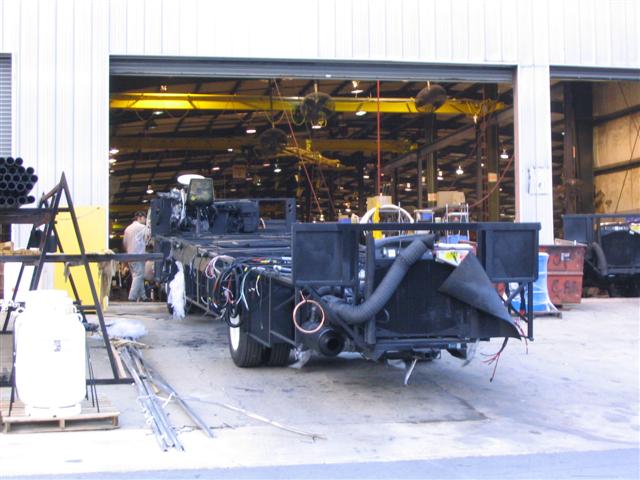
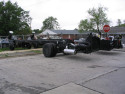
| 3 |
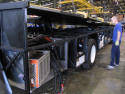
|
outside station 1 |

Chassis outside plant, welding done and harnesses in place, ready to go into Station 1 |
|
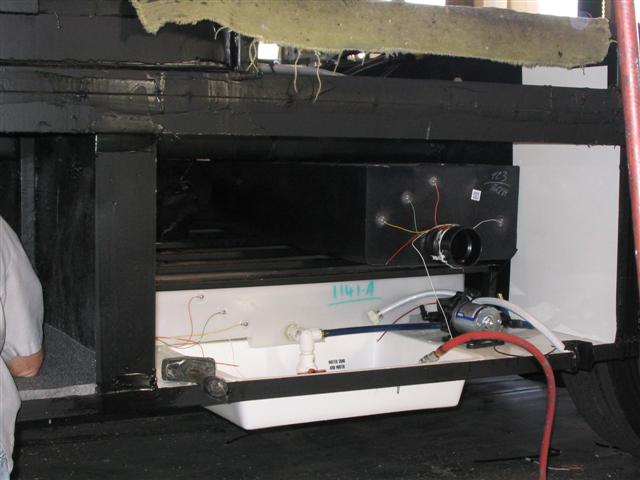
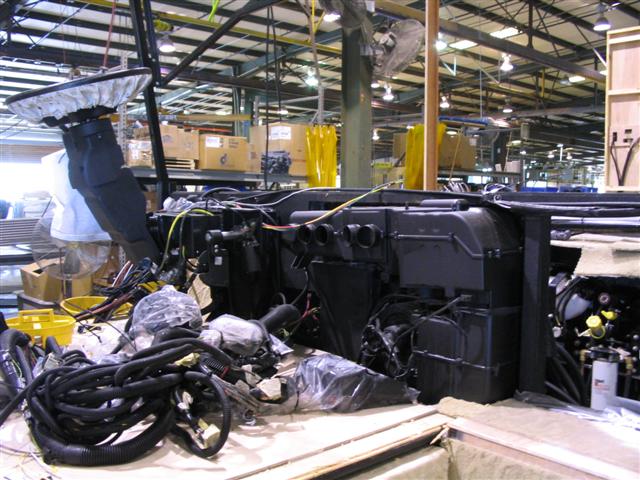
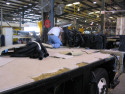
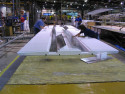
| 07:15 |
1 |
fresh water tank on bottom and grey and black tanks above,
metal boxes for smaller compartments, floor for large compartments in centre,
felt lining in all compartments, slide-out trays, LP gas lines,
plumbing below deck, seal compartments and chassis
Station 1: installing storage bay |

Station 1: fresh water and black tanks installed |
|
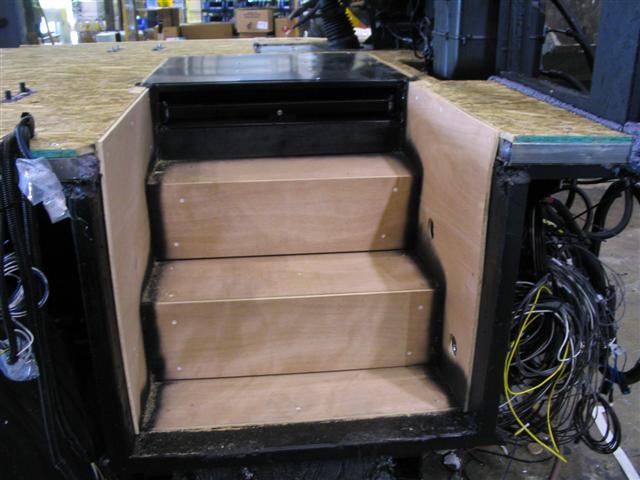
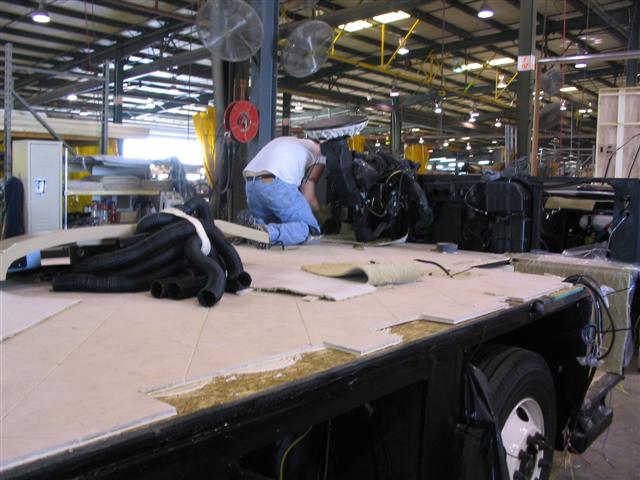
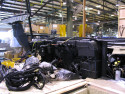
| 08:30 |
2 |
sub-floor, step covers (wood), sort wiring harness and pull through floor
Station 2: lowering the sub-floor into place |
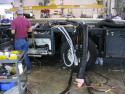
Station 2: Spaghetti! |
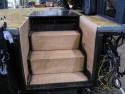
Station 2: entrance stairs |
Video (Windows WMV):

Station 2: floor
(3 MB, 30 s) |
|
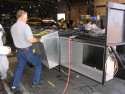
| 09:55 |
3 |
tile floor, install engine cover in bedroom, carpeting, electric seat wiring, run all speaker wire inside, install slide rollers
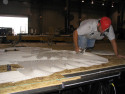
Station 3: applying glue for the tile floor |
Station 3: tile floor |
|
| 11:10 |
4 |
cabinetry bases, plumb sinks and toilet, electrical cables in cabinets,
front frame installed (for alignment of sides/top), dash and passenger seat controls,
washer/dryer (optional)

Station 4: rear interior walls and cabinets |
Station 4: More spaghetti! |
|
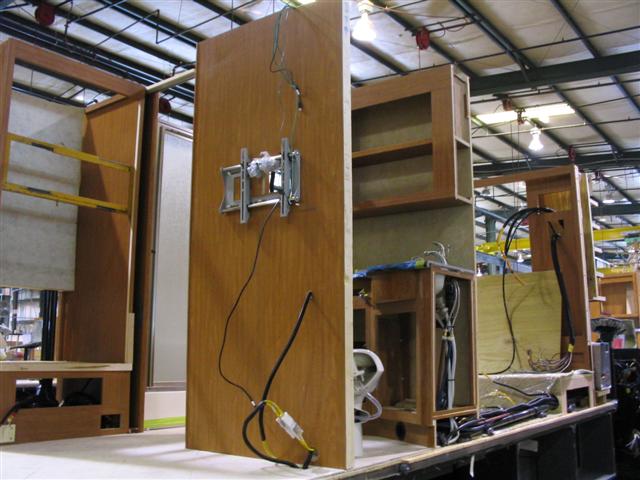
| 13:05 |
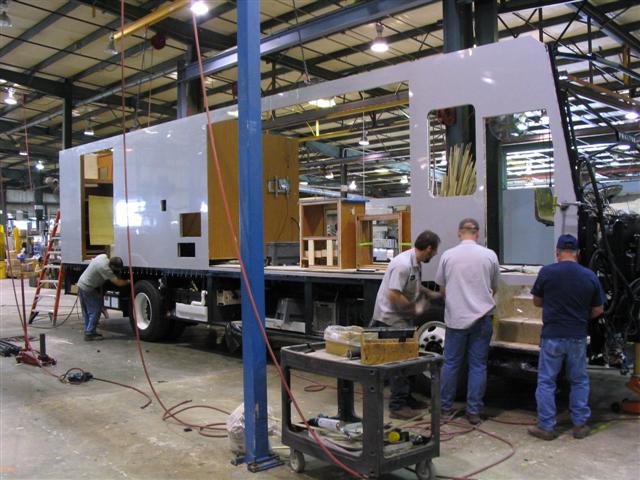
5 |
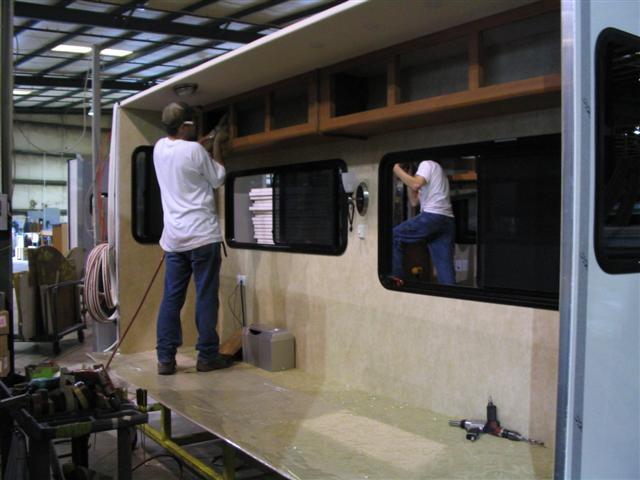
cabinetry (continued), flooring screwed on, cedar panel in closet (Allegro Bus),
aluminum rear wall panel, bedroom wiring in closet, exterio side walls attached

Station 5: Passenger side wall |
Video (Windows WMV):

Station 5: wall
(3 MB, 30 s) |
|
| 4 |
06:00
| 6 |
electrical wiring in front console, entertainment console coax wiring,
front overhead cabinet installed, partition walls
Station 6: installing front cabinets |
Station 6: installing mid-coach TV/bathroom wall |
|
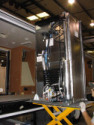
| 07:15 |
7 |
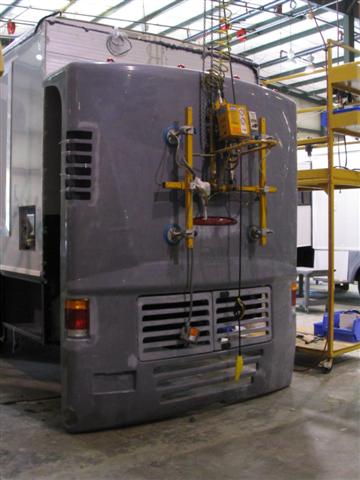
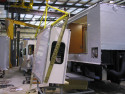
electrical (continued), pre-built roof installed, roof fiberglass skin installed,
weather stripping on basement, crown molding in bedroom
Station 7: Building A/C ducts inside roof |

Station 7: The final roof |

Station 7: Ready to lift roof in place |
Station 7: The roof is almost in place |
Video (Windows WMV):

Station 7: picking up the fibreglas roof skin
(1.5 MB, 30 s)
| 
Station 7: lowering fibreglas roof skin onto the roof
(3 MB, 30 s) |
|
| 08:15 |
8 |
electrical switchboxes in bedroom breaker panel, trim, satellite antenna,
wiring and roof rails, air conditioners

Station 8: wiring the bedroom breaker panel |
Station 8: wiring roof lights |
|
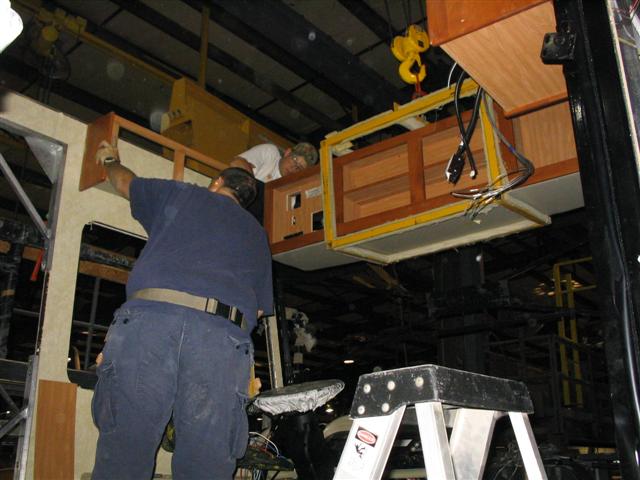
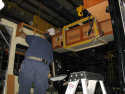
| 09:55 |
9 |
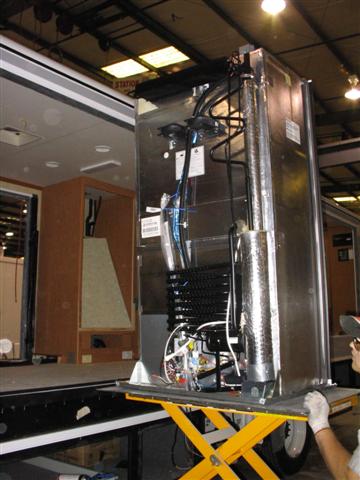
refrigerator and slides (the day before your coach reaches Station 9, look for your slides on the side)
Station 9: Installing the Norcold refrigerator |

Station 9: Assembling the LR slide beside assembly line |
Station 9: Installing the rear passenger side slide |
Video (Windows WMV):

Station 9: front PS slide
(1.7 MB, 30 s) |

Station 9: rear DS slide
(3 MB, 30 s) |

Station 9: front DS slide
(3 MB, 30 s) |

Station 9 to Station 10
(0.9 MB, 7 s) |
|
| 11:10 |
10 |
windows, front cap, rear cap, air horns, CB/FM antennas, TV antenna, cell antenna (optional),
finish roof caulking
Station 10: using a laser to align the front cap |

Station 10: Installing the rear cap |
Video (Windows WMV):

Station 10: front cap
(2 MB, 30 s) |
|
| transit |
10 to 11 |
Station 10: Exiting the plant after Station 10 |
Video (Windows WMV):

Station 10 to Station 11
(2 MB, 21 s) |
|
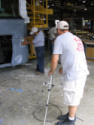
| 13:05 |
11 (small building outside main plant) |
undercoating, fill Hydro-hot (if applicable),
fill propane tanks, check for water and LP leaks
Station 11: Spraying the undercoating |
Video (Windows WMV):

Exit Station 11
(1.7 MB, 16 s) |

Enter Station 12
(3 MB, 30 s) |
|
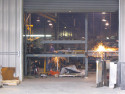
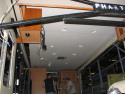
| transit |
11 to 12 |
Station 12: Re-entering the Tiffin plant at Station 12 |
|
| 5 |
06:00 |
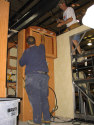
12 |
lower external compartment doors, hardwood on slide-outs, entry door

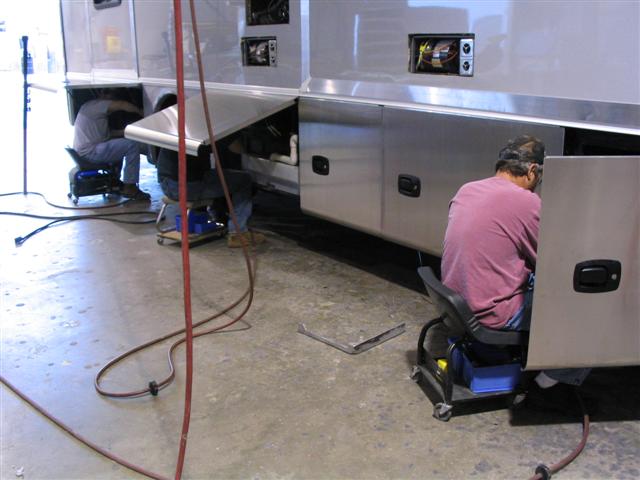
Station 12: Installing storage bay doors |
|
| 07:15 |
13 |
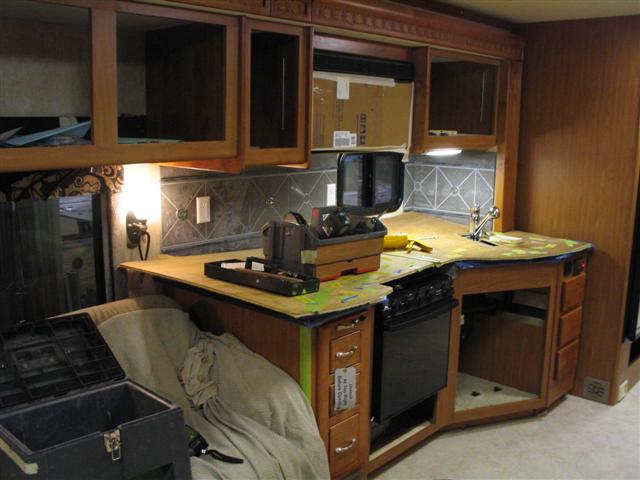
hardwood (continued), finish dash
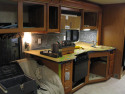
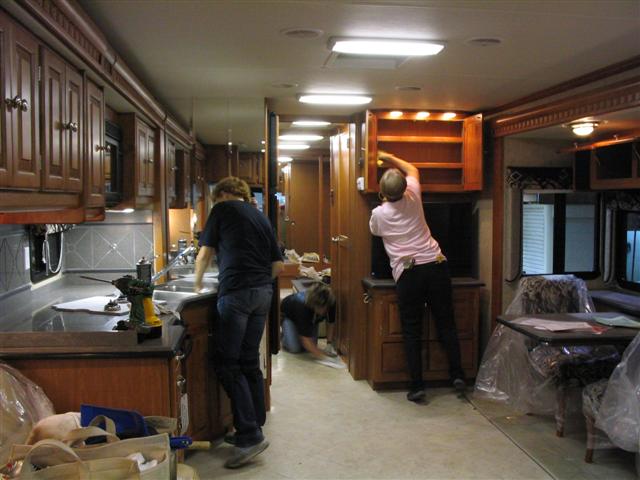
Station 13: A messy kitchen! |
|
| 08:30 |
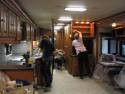
14 |
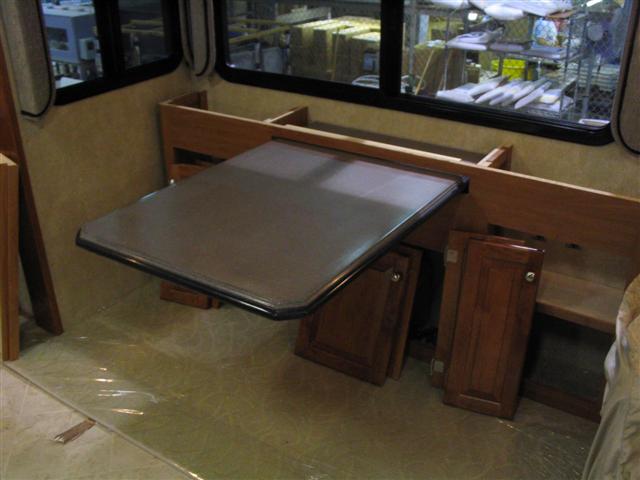
cabinet doors, drawers, lambrequins (decorative wallpaper border), driver and passenger seats, televisions, surround sound

Station 14: Adding cabinet doors |

Station 14: Aftermath of a wild party in this living room! |
|
| 09:55 |
15 |
door awning, stair treads, mattress, clean inside
Station 15: Cleaning staff hard at work |
|
| 11:10 |
16 |
cabinet/woodwork dings repaired, work on QC checklists
Video (Windows WMV):

Station 15 to Station 16
(1.7 MB, 16 s) |
|
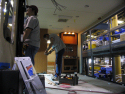
| 13:05 |
17 |
QC (continued), cleaning (continued)
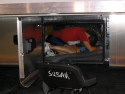
Station 17: If you take Susan's picture vacuuming inside the bays, warn her before the flash goes off! |
|
| 6 |
06:00 |
18 |
QC completed
Station 18: A sample Q/C sheet |
|
| 07:15 |
19 |
touchup wood inside, weigh coach (4 wheels) as it enters station 19.
Note: The Phaeton 42, Allegro Bus 42, and Zephyr are not weighed in the plant because they have tag axles.
They are taken to Sunshine Mills for weighing.
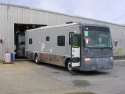
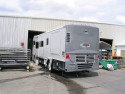
Station 19: 2007 Phaeton 36QSH exiting Tiffin plant |
Station 19: If you're lucky, Bob Tiffin will walk by as your coach is born! |
Video (Windows WMV):

Station 19: weighing (Chris Berry at the wheel)
(1.3 MB, 12 s) |

Exit Station 19: a coach is born!
(2.6 MB, 25 s) |
|
| |
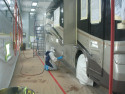
leak check |
Just outside station 19, the coach is parked near the small building and a worker
goes up top with a water hose and thoroughly soaks the coach to check for water leaks.
In particular, they are looking for water coming out the A/C vents, indicating
insufficient caulking on top.
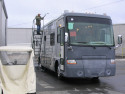
Station 19: After exiting at Station 19, the coach is sprayed with water to check for leaks |
Video (Windows WMV):

Station 19 to leak check station
(1.8 MB, 17 s) |
|
| Mechanical shop |
| |
|
|
The coach is driven over to the mechanical shop again, and the front end and headlights are aligned. Then it is taken for a road test and driven over to the paint plant in Belmont, MS. |
| Paint plant (Belmont, MS) |
| |
|
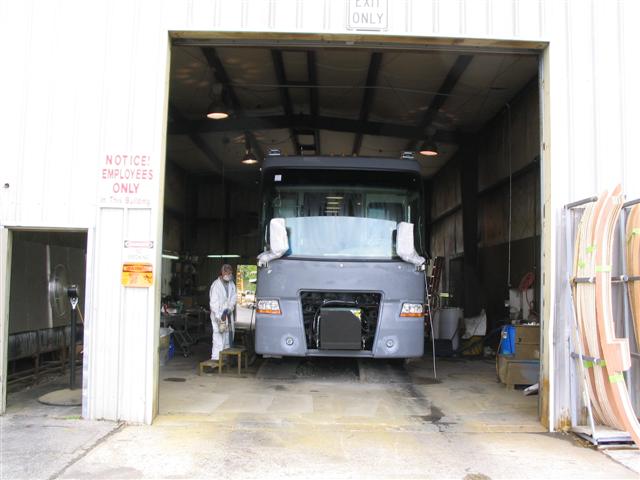
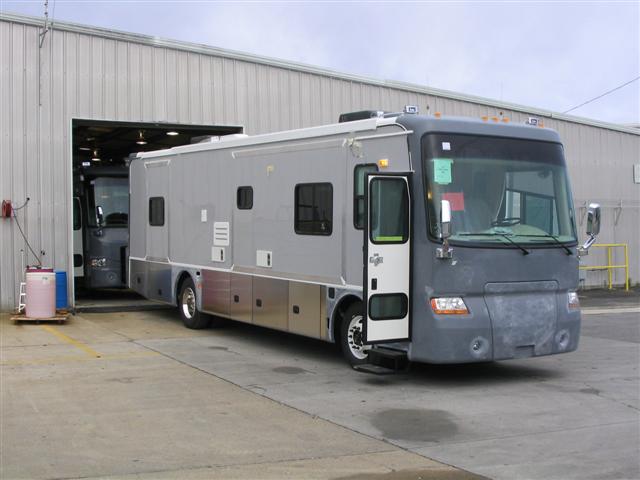
Sanding |
The coach is painted with a blue dye to help locate the low and high spots, and then it goes through 4 stages of sanding to ensure a perfectly smooth surface.
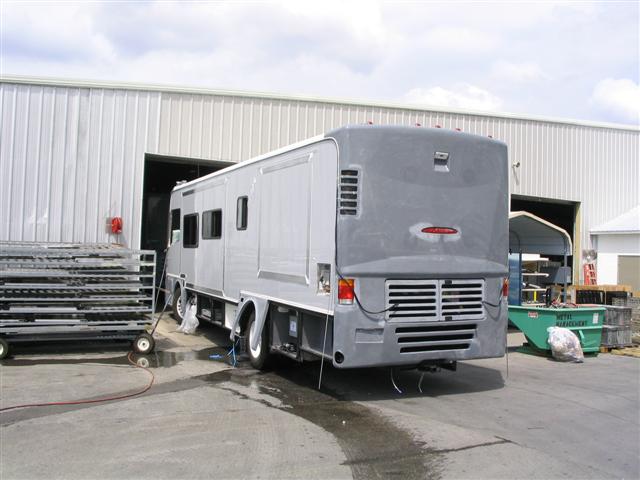
Belmont paint plant: blue dye on exterior prior to entering building for sanding. |
|
| |
|
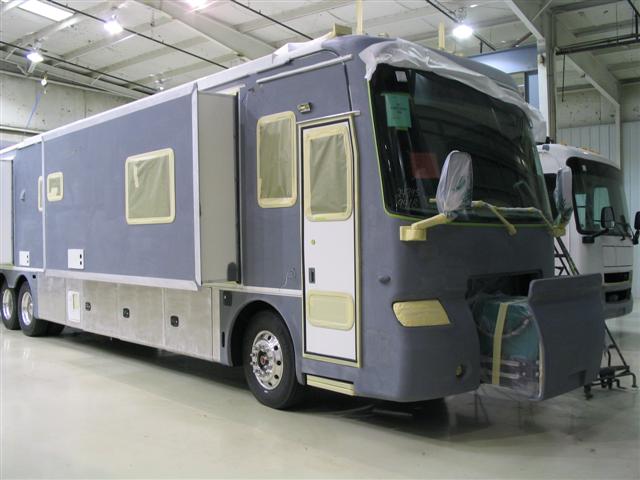
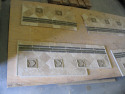
Masking & painting |
The coach is masked to protect window trim, and other non-painted parts, and receives a base coat of paint.
After that it is again masked for the striping and design. The coach is spray painted by several workers, all by hand, in a huge modern paint booth.
Belmont paint plant: windows and trim masked before painting (SOC) |

Belmont paint plant: base coat has been applied (SOC) |
Belmont paint plant: inside the paint booth (SOC) |
|
| |
|
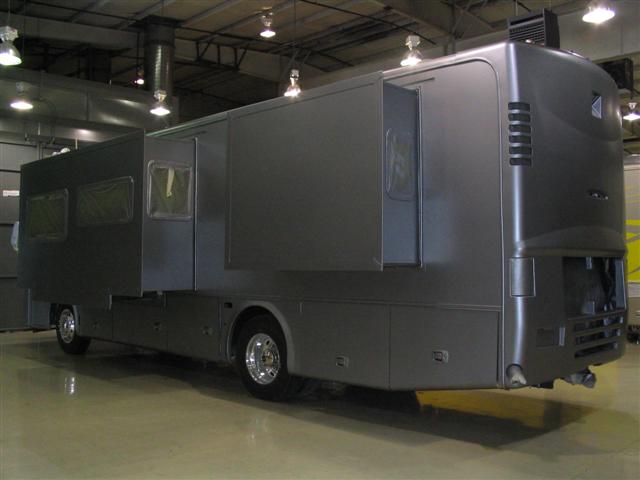
Final finish |
When the striping is done the coach is then given a layer or two of clearcoat, which makes it shine and provides UV protection. The paint is then baked in that same booth for a relatively short period of time. Finally, the coach is unmasked, inspected, touched up and polished.

Belmont paint plant: polishing (SOC) |
Belmont paint plant: more polishing (SOC) |
|
| |
|
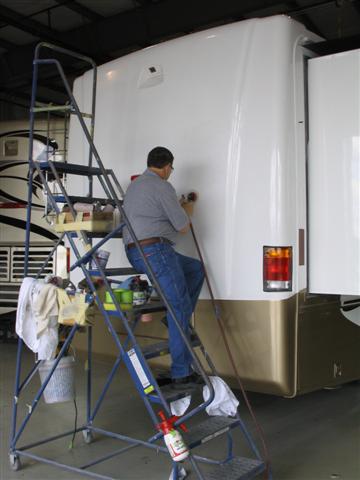
Final trim |
The finished painted coach is driven next door to have awnings and decals installed and various
seams siliconed. Then it is given a vigorous shower in the rain booth to check for leaks. |
| |
|
Tile shop |
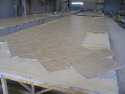
Belmont paint plant: tile floors being assembled (SOC) |
Belmont paint plant: tile backsplash panels being assembled (SOC) |
|
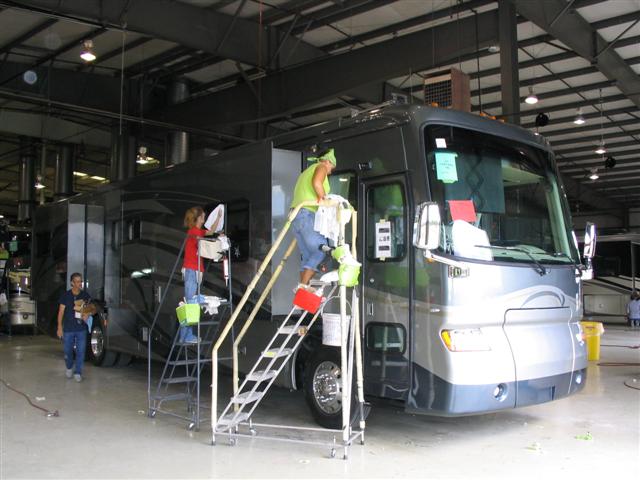
| "Fit & Finish" (Red Bay) |
| |
|
|
The finished coach is driven back to the plant at Red Bay, to the 'Fit & Finish' area (beside Station 19) in the factory, where it is cleaned, inspected and readied for delivery to the dealer. Generally
it returns to Belmont where it is picked up and driven to the dealer. |
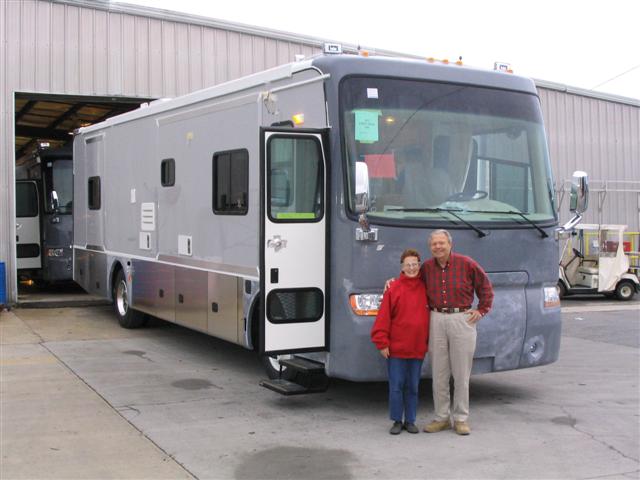
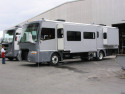
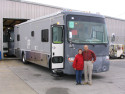
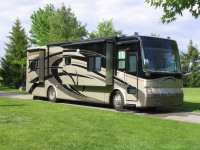
The finished product
After all of that, here's the gem that came out of the factory. Our 2007 Phaeton 36QSH.
Ain't she a beauty? 
John A. Grant ("jag&bev")
with input from Dave ("66 VOL")
and Tom ("Tom A.") (2007-09-08)
Click Your browser's "Back" button to return to the previous page
or chose another category from the side menu.
TiffinRVnetwork.com
24 West Thrush St
Apopka, FL 32712
PHONE: (321) 256-1804
Toll Free: 1-(866)-584-3322
Absolutely
No Affiliation exists between this group and Tiffin
Motor Homes Inc or the Allegro Club. This website
neither endorses or discourages the use or purchase of a
Tiffin product. All references, suggestions, comments,
etc. contained herein are the opinions/experiences of
the posters and not those of Tiffin Motor Homes Inc. or
the website administrators.
|