Library Contents Search the Library RV Tech Library Help Page Site Map About Us Tiffin RV Network TRVN Classifieds Campground Reviews Photo Gallery TRVN Store
Appliances Batteries Boondocking/Dry Camping Chassis Clubs & Forums Electrical Electronics Engines Exterior Maintenance Generators Heating & Air Conditioning Interior Maintenance Misc Items Operating Tips Plumbing Red Bay Safety & Health Storage Supplier Contacts Tires and Wheel Rims Towing Transmissions Weighing
![]()
Installing an M&G Tow Brake
I've used a Brake Buddy and US Gear's Unified Tow Brake in the past but after trying the M&G tow brake I'm spoiled. The M&G Tow Brake is a great setup. It utilizes the existing air brake system of any coach with air brakes to proportionately actuate the toad's brakes. For RVs without air brakes they do offer an air compressor setup, but this does add to the cost. The beauty of this system is that there are no electrical connections and no decelerometers. When descending a grade the jake brake will not prematurely engage the toad's brakes. The only time the toad's brakes work are when the coach's brakes are applied. Being totally proportional the amount of braking depends upon how hard you step on the brake pedal so the toad and coach are always in sync.
Installation on the coach is very simple. You simply tap into one of the brake service lines at the rear axle with a tee fitting, then run the extra nylon line to the rear of the coach where you intall a quick disconnect coupling. Tapping into this line is no different than feeding a tag axle. In the event of a failure the brake system's isolating valves would still give you 3 wheels worth of braking and the air pressure loss by a severed line would be very minimal because it's the service line, not the "hot" emergency line.
So, after having this system on my Allegro Bus and Grand Cherokee for some time I felt it was time to add it to the Wrangler for when we tow it. Following details some of those steps.
First, you have to install the M&G adaptor.
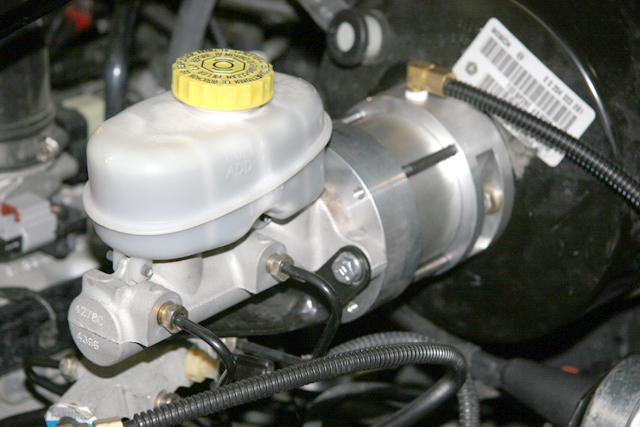
This adaptor fits between the master cylinder and the vacuum booster. It consists of a housing with an internal split shaft. Where the shaft is split the piston on the frontmost half is acted upon by the air pressure input. Whenever you are not towing, this system acts as a large pushrod allowing the brakes to function normally. This is a fail-safe design so even if the M&G module was to fail you would still have manual braking. However, when towing, there is nothing pushing on the pedal. Instead, the air pressure from the coach is applied to the M&G module which works the front half of the split shaft to apply the brakes evenly and in direct proportion to the coach. I did have to relocate the cruise control diaphragm unit which was in the way of the master cylinder but that was easy enough. I just relocated it to a wide open space underneath the master cylinder (it's barely visible in the lower-right corner of the above photo).
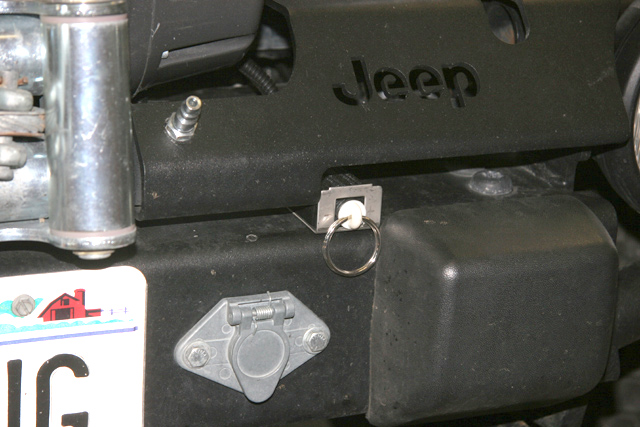
The RV connects to the front of the Jeep with a short nylon hose with a male and female quick disconnect fitting. I find that running it inside the coiled trailer light umbilical makes it nice and simple. There is nothing to hook up or install inside the towed vehicle and once installed it's totally invisible. You just plug in the hose and go.
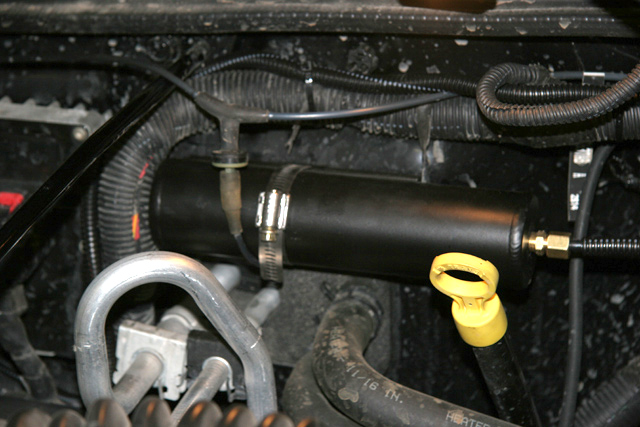
I also ordered the optional breakaway kit. This kit consists of a small air reservoir tank that will supply air to the M&G module should the toad come loose from the RV.
This air tank is charged up after 3 good pushes on the brake pedal and holds enough air pressure to lock up the brakes on the towed vehicle should it come unhooked from the RV. It is connected to a 3 way solenoid valve.
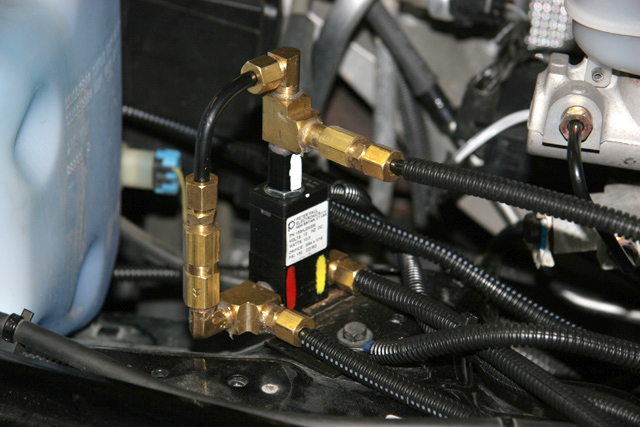
This valve allows the tank to charge up while driving and directs normal braking air pressure to the M&G module. Upon breakaway, the valve dumps the contents into the M&G module and locks it up to keep the toad from going ballistic. This does require wiring in a breakaway switch. One wire goes to ground an one goes to a battery "hot" source. I mounted both the breakaway switch and the air inlet fitting on the front bumper of the Wrangler. The breakaway cable, as well as the air line, fits neatly inside the coiled trailer light umbilical cord to protect it from dragging or snagging. Both the hose and cable were cut to the exact lengths to eliminate any excessive "stuff" hanging out.
M&G recommends that you just leave the hose loosely coiled up under the hood of the towed vehicle, then hang it out the
hood when towing. I wanted something more stationary so I mounted everything in the bumper. Besides, it's a Wrangler, not a Ferrari.
![]()
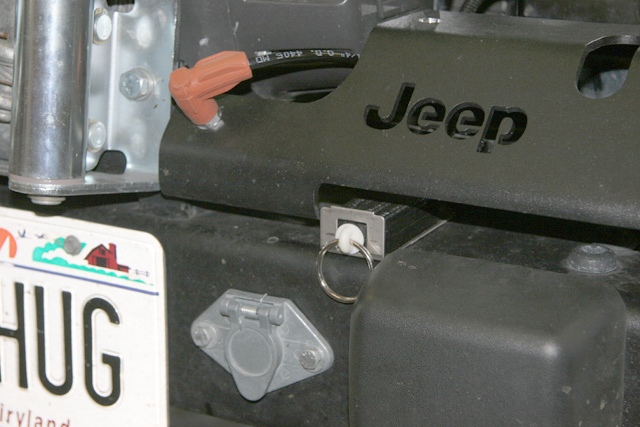
The only drawback to this is that you can get dirt into the fitting. M&G states that the end of this hose should not be capped off or else air pressure could increase within this hose as things warm up under the hood and you might find your brakes dragging while driving. To rectify I took a right angle spark plug boot and inserted a short whip of the nylon brake tubing into it. This gave me a vented dust cap which keeps dirt out, yet allows venting of the system.
Submitted by Mark Quasius - 4/24/06
The RV Tech Library is brought to you by the TiffinRVnetwork
Absolutely No Affiliation exists between this group and Tiffin Motor Homes Inc or the Allegro Club. This website neither endorses or discourages the use or purchase of a Tiffin product. All references, suggestions, comments, etc. contained herein are the opinions/experiences of the posters and not those of Tiffin Motor Homes Inc. or the website administrators.
|
|